
Adding the Agent step to a project


Using the Agent step
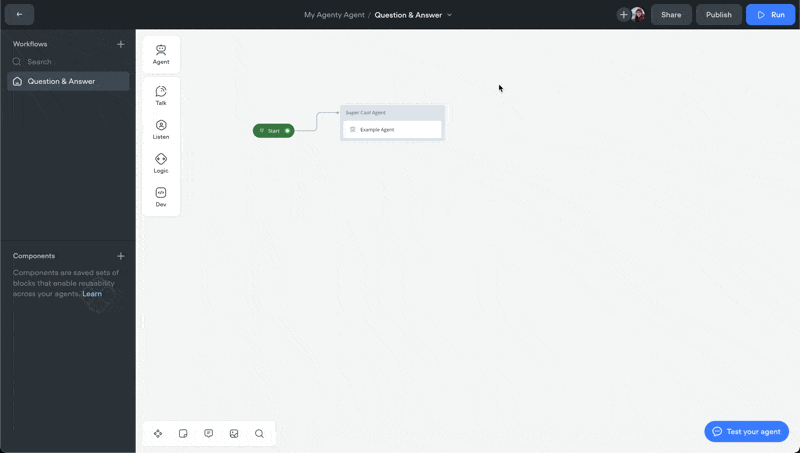
The Agent step can be added to any Voiceflow project - just drag it onto your canvas and connect it to the rest of your workflow.

Just like with functions, you'll have the choice of creating a new Agent, or starting with a pre-made community Agent. Community Agents are designed to get you started with common use-cases - such as customer support and appointment booking - as quickly as possible.
Agent step settings
After you choose a template or create a new agent, you'll two options in the sidebar: listen for other intents, and exit every conversational turn.
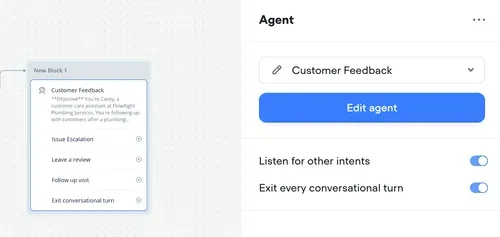
- Listen for other intents works just like how it does with all other Voiceflow steps. If the user triggers an intent, then the user will be taken to that intent's workflow, rather than the Agent step responding to their message.
- Exit every conversational turn will automatically trigger the Exit conversational turn path after each message. This can be useful if you're want to use the Agent step for a single interaction and then immediately move on, although most use-cases work better with it disabled.
Building an Agent
That's the basics of the step itself, but we've barely scratched the surface with Agents. You can open an Agent via the Voiceflow CMS or by clicking the Edit agent button on the Agent step.
In our next lesson, we'll talk about how to build an Agent. Agents are the brains behind the Agent step, and allow you to build conversational and interactive user experiences.
Resources

Build AI Agents for customer support and beyond
Ready to explore how Voiceflow can help your team? Let’s talk.